Appcentric Sidekick for Umbraco
Appcentric Sidekick for Umbraco is a plugin that connects your site to the OpenAI ‘chat’ APIs. This means you can ask ChatGPT for content and have it seamlessly insert this text into your web page.
Administrator instructions can be found here Sidekick Administration | AppCentric
Once installed and configured, Sidekick-capable editors will appear in your content views where your developer/administrator has chosen to make them available.
Features
- Give a topic for Sidekick to write about (you do not need to be able to engineer complex prompts)
- Specify a tone-of-voice - based on the overall website tone, the style of a particular author or page, or a general tone from a pre-defined list
- Choose a length for the generated text - small, medium or long
- Add up to three reference sites to give Sidekick extra information - this allows you to refer to recent news articles that the base AI model is unaware of
- Insert the generated text into a Textarea or Rich Text Area with the click of a button
- Uses the latest OpenAI large language models (that power ChatGPT)
User Instructions
Sidekick Editors
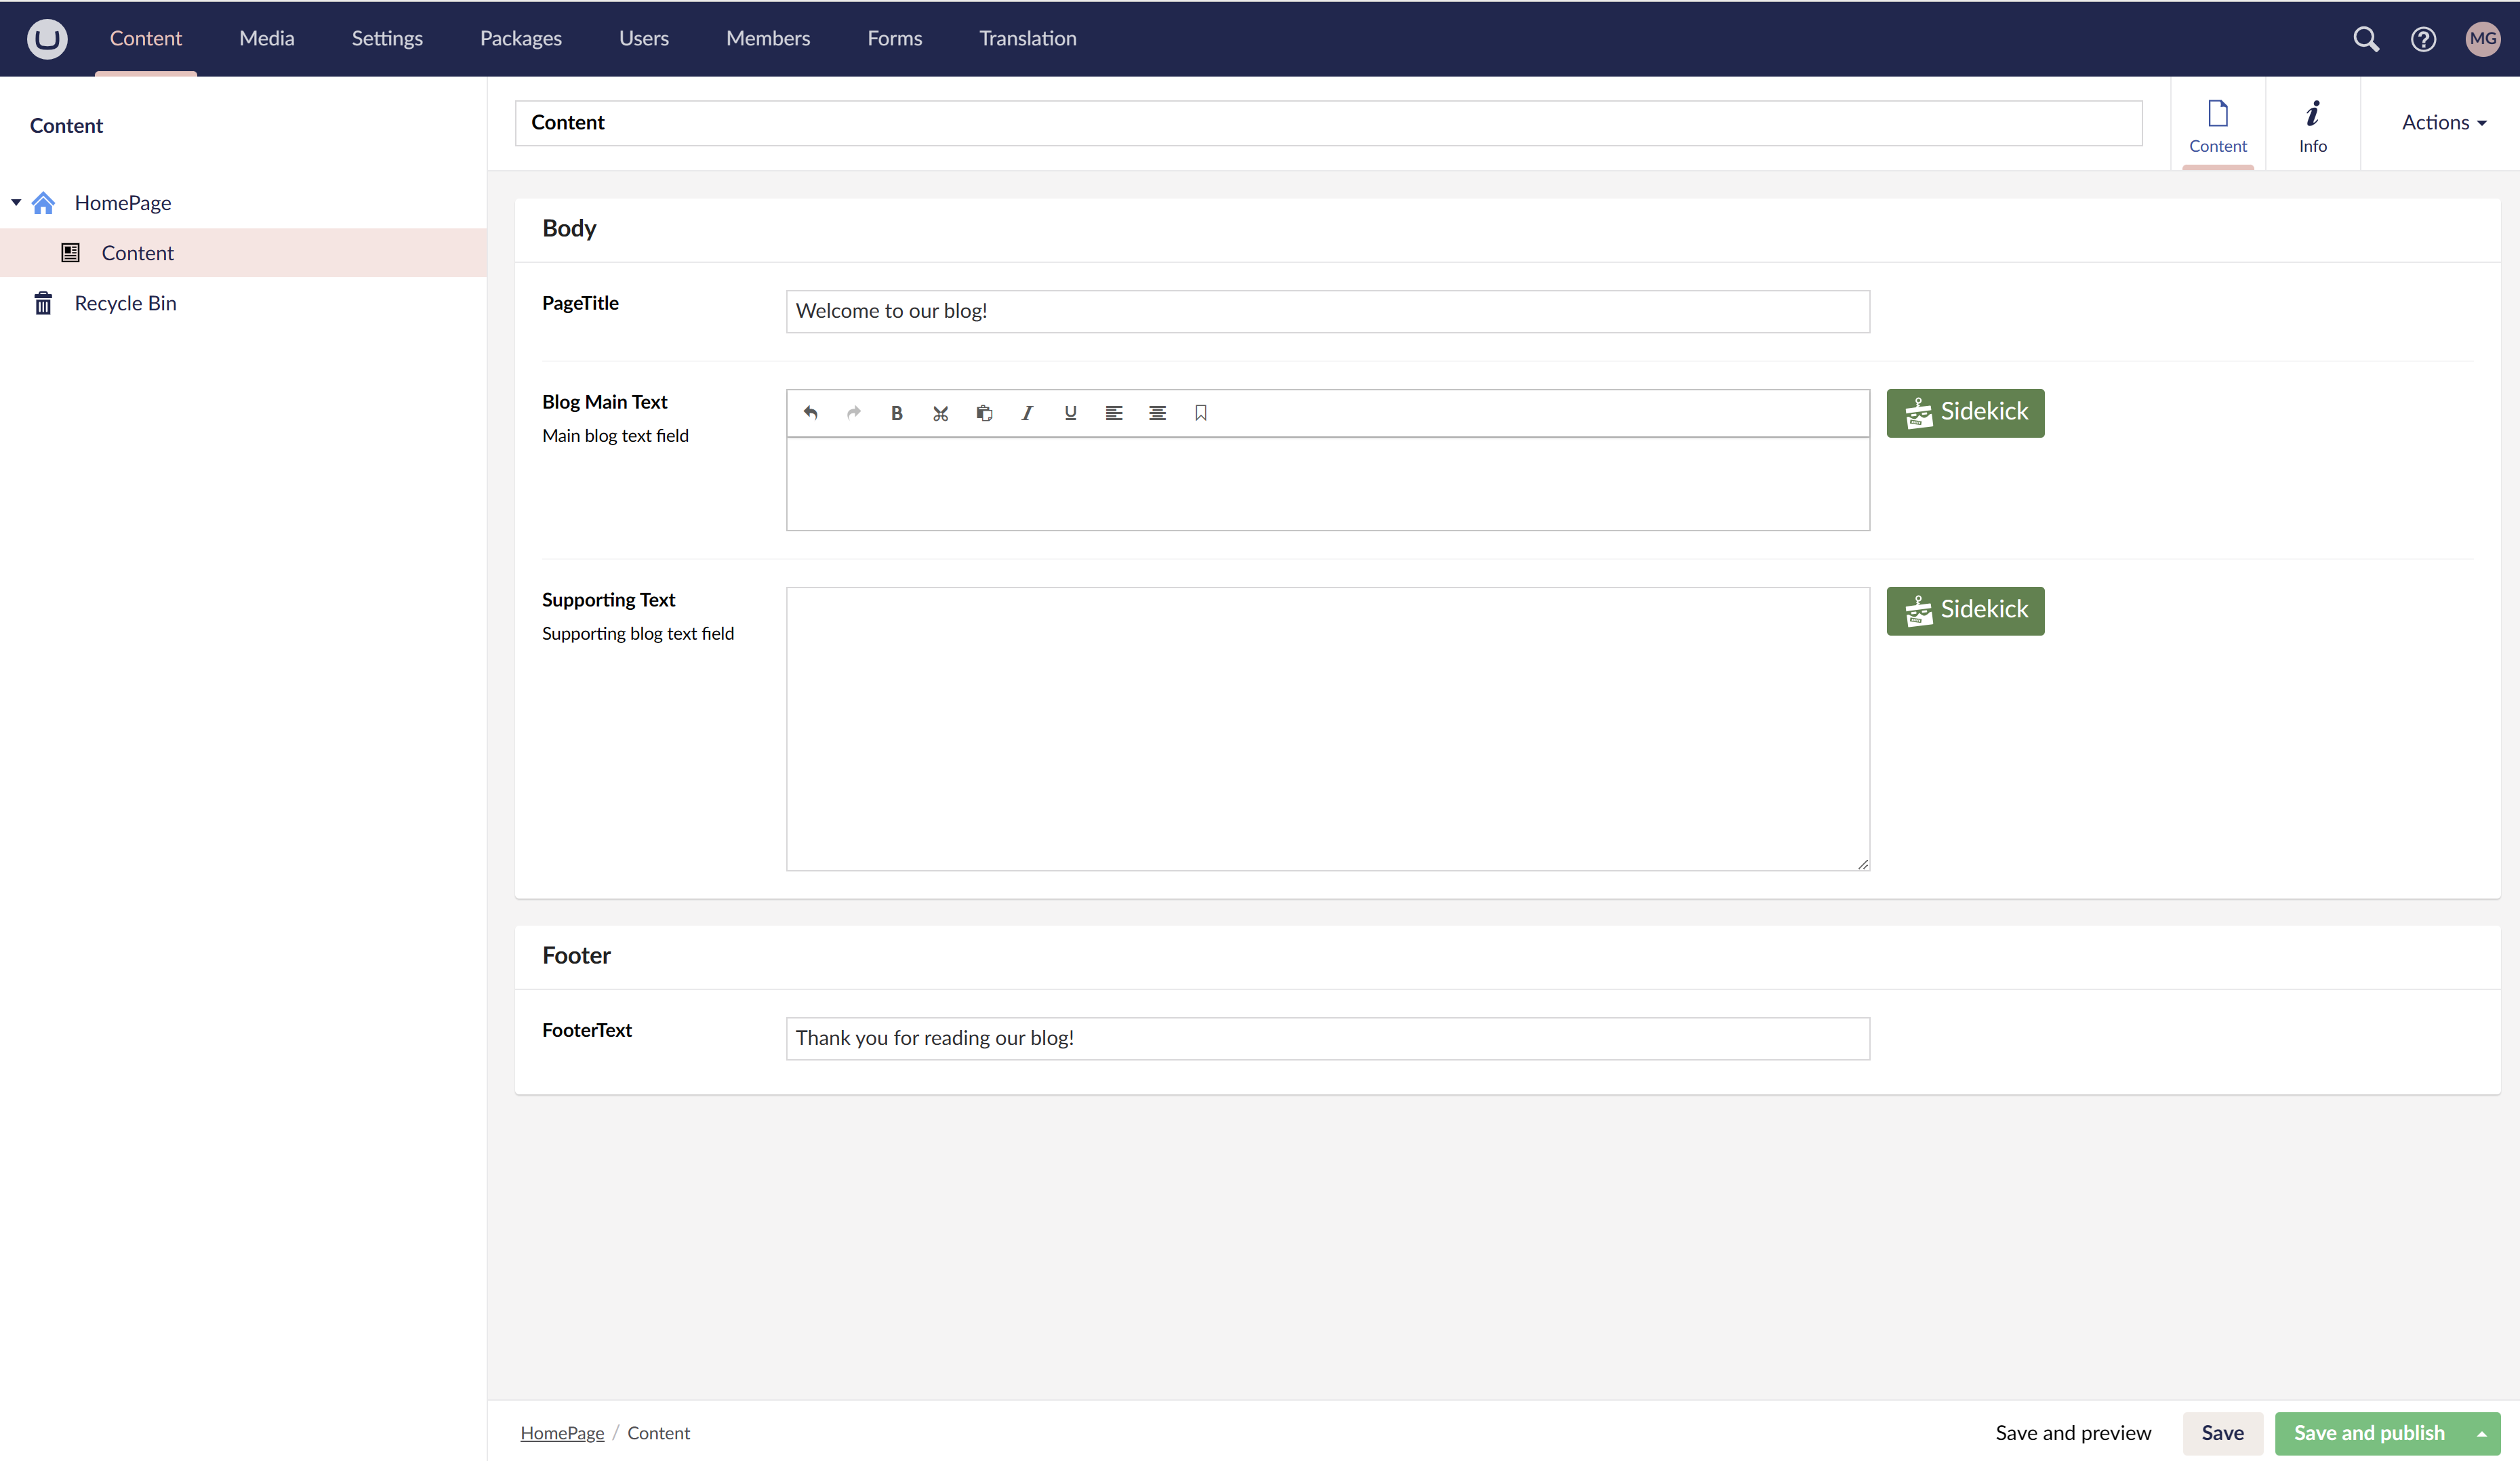
There are two Sidekick capable editors: Textareas and Rich Text Editors. You will recognise these by the presence of a ‘Sidekick’ button adjacent to them.
The image shows two Sidekick editors in this content page: the first is a Rich Text Editor, allowing the usual array of text styling controls, and the second is a plain Textarea editor that does not allow styling.
These editors can be used as per normal without any Sidekick interference. You can type in text, style it in Rich Text Editors, hit ‘Save and publish’ and your page will publish as normal.
Sidekick Panel
Clicking on the Sidekick button will open a panel that will allow you to automatically populate the control with text content generated by ChatGPT.
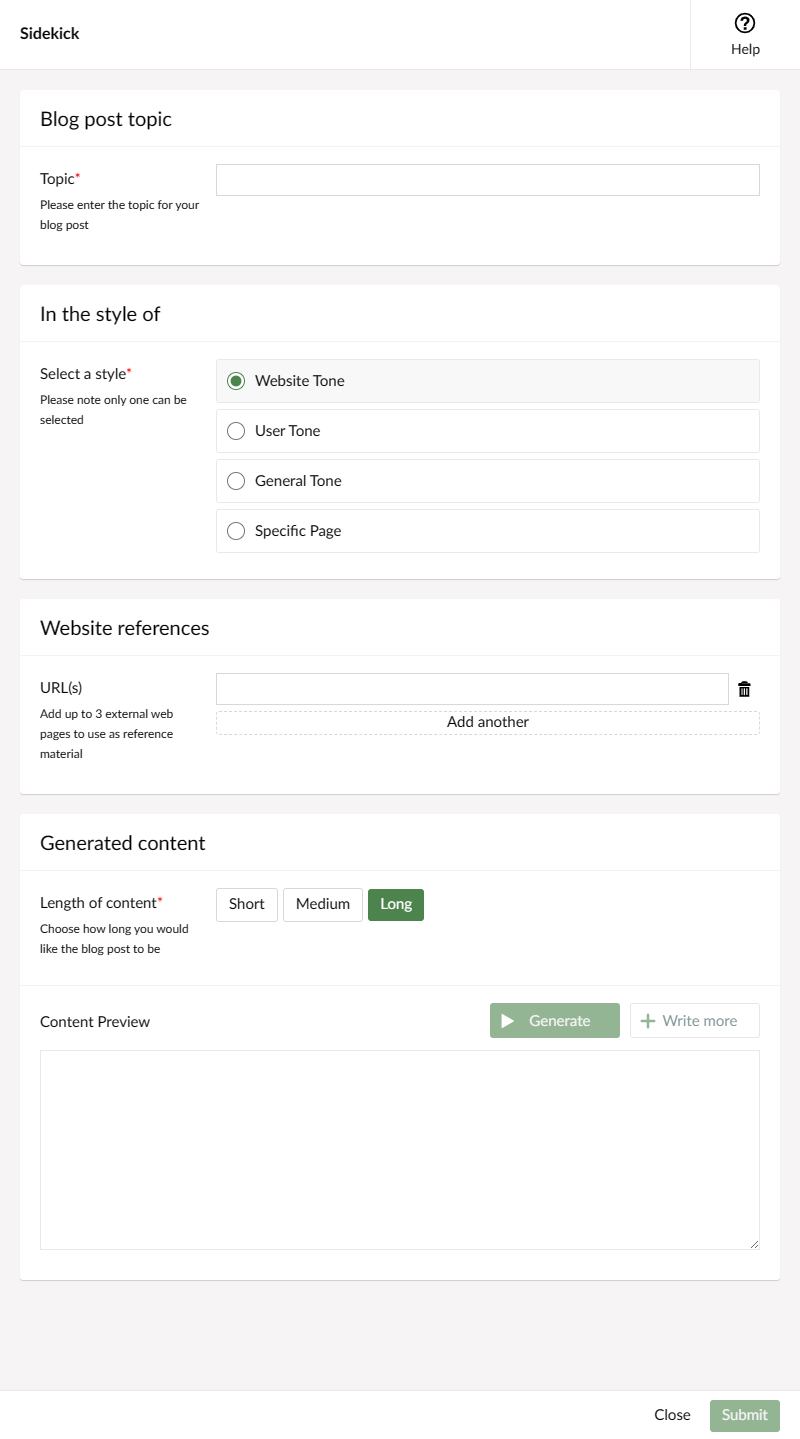
The panel that slides in from the right has a number of sections that allow you to tailor the content generated by ChatGPT. These sections are described below.
Blog post topic
This section is where you enter the subject of the text you wish to generate. The interaction with ChatGPT is already primed to write a blog post, you just need to tell it what to write about. In this example, I will ask for a blog post about Umbraco 12.
You do not need to write any more in this field than the precise subject you wish ChatGPT to write about. It sometimes helps to be more detailed if the answer isn’t what you expect, but there is no need to add ‘Tell me about’ or similar to the start of the topic.

In The Style Of
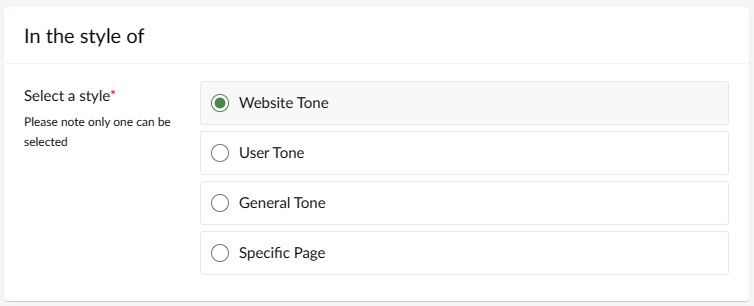
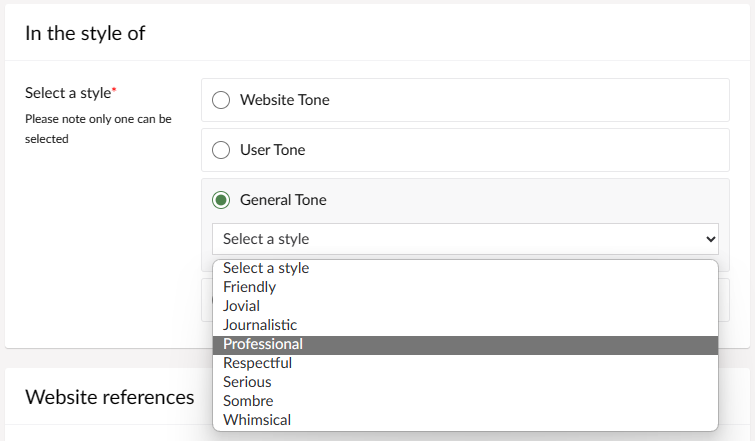
This section allows you to specify the tone of voice of the generated text. There are four options, and you must choose only one. You can change the tone of voice at any point and generate some new preview text.
Website Tone
This is the default tone of voice, and it will use the default style that your website is written in as a guide when generating the text. For many purposes this option should suffice.
User Tone
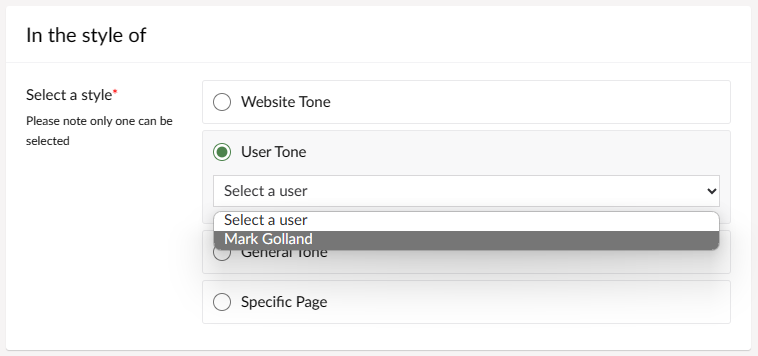
If you wish to generate text in a similar style to a particular user, select this option and then choose the user from the dropdown. Sidekick will attempt to generate text in a style as close as possible to the style of the chosen user, based on their existing content.
General Tone
If you wish to choose from a set of pre-determined styles, select this option and then choose from the drop-down list. A variety of different tones of voice are available here.
Specific Page
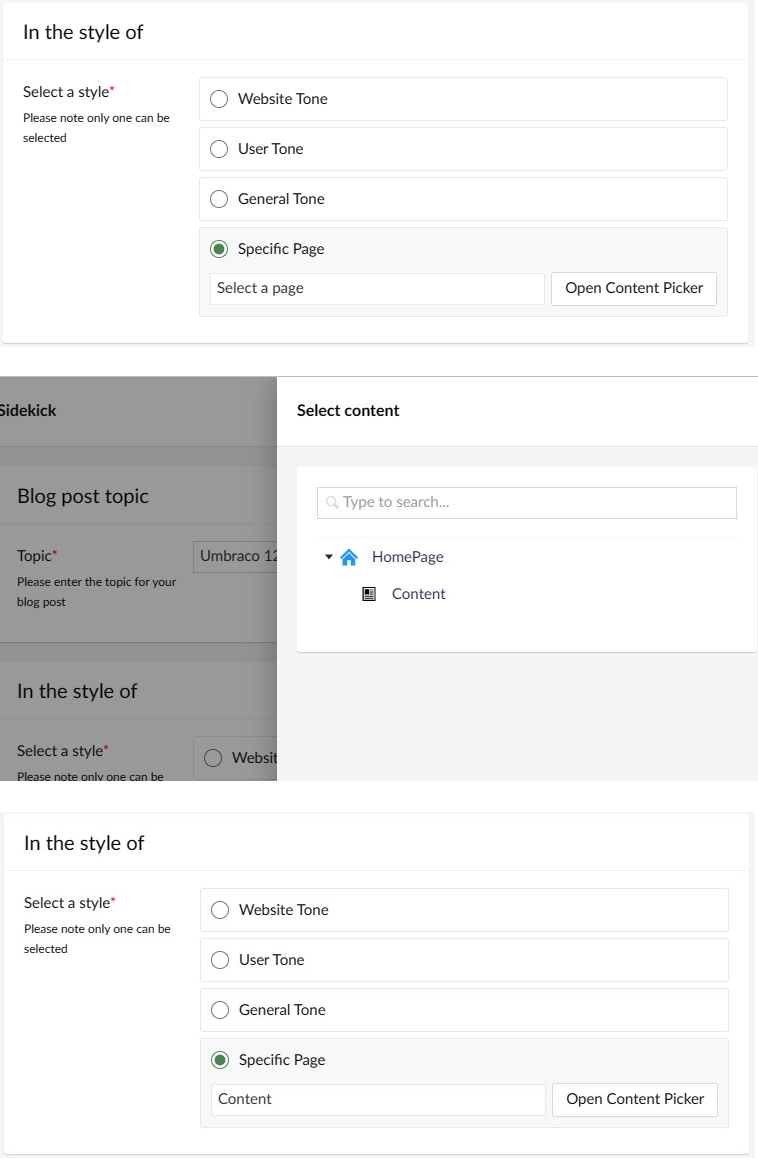
If you wish the text to be in a similar tone of voice to a specific page within your Umbraco website, select this option and then click ‘Open Content Picker’. A standard picker will slide in from the right allowing you to choose the particular page from the tree.
In this case, the user will select the ‘Content’ page by expanding the tree and clicking on it. The content picker will slide away and the ‘Select a page’ field will now show the name of the chosen page.
Website references
Out of the box, ChatGPT knows nothing beyond the year 2021 (as of this documentation). It also doesn’t know about anything it has not been trained on. In order to circumvent this, we need to give it some extra context to help it write a blog post (unless it is about something very generic that it may already have knowledge about).
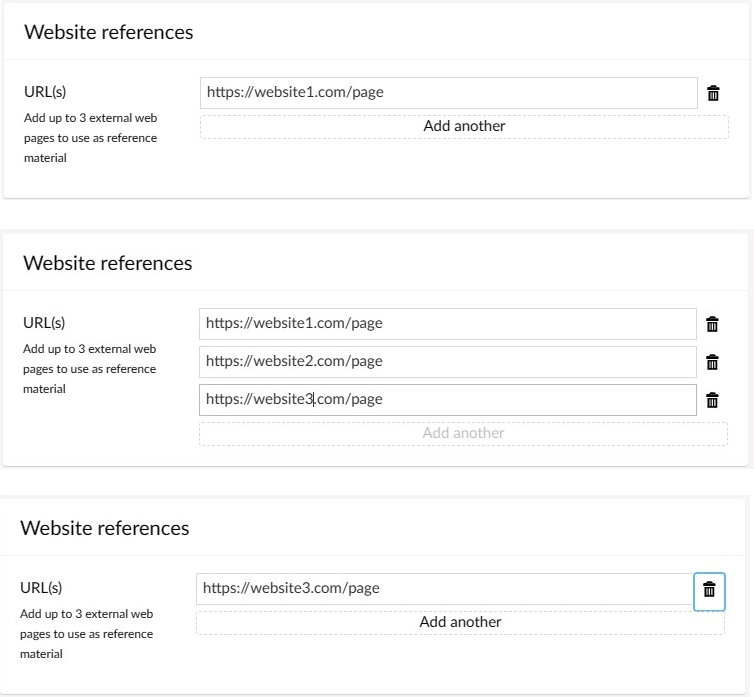
This section allows you to specify up to three website pages to provide extra information to ChatGPT.
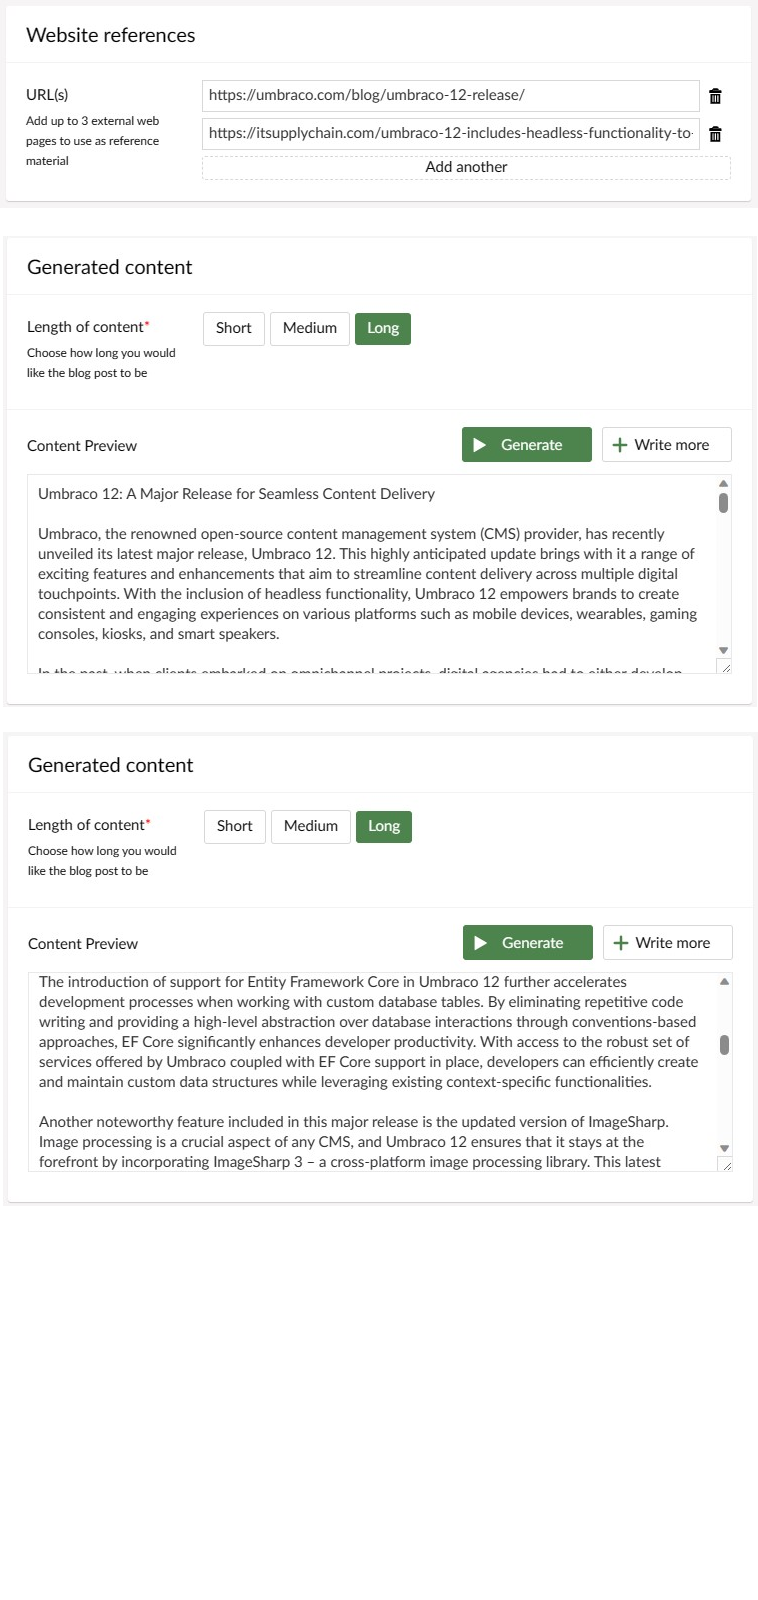
To specify a website page, simply type the URL into the field as shown.
If you wish to add more, then click ‘Add another’ and another row will appear (up to a maximum of three).
To remove sites, click the bin icon.
Empty rows will be ignored.
Generated Content Area
This section is where you generate the blog post and review the text before inserting it into the editor on the content screen.
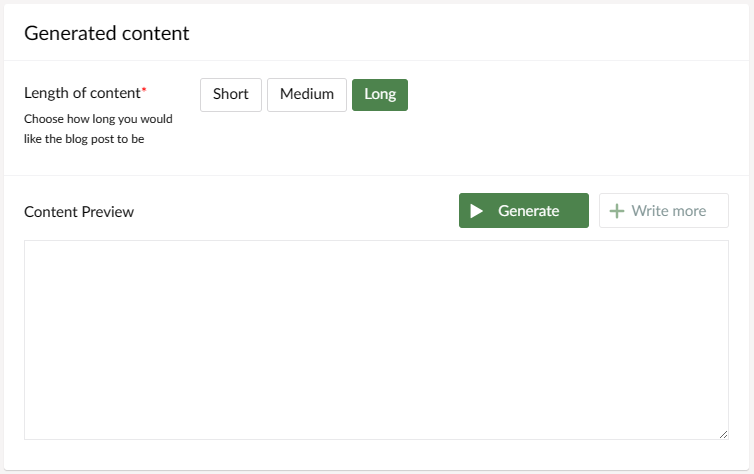
You may select whether you wish to generate a short, medium or long piece of text. Due to the limits of the OpenAI api and its nature as a language model that attempts to predict the next words it should say, it is not possible to guarantee exact lengths, so these options are merely guidelines rather than rules. Typically though, a small blog should be around 250 words, a medium one around 500-700 words, and a long blog around 600-800 words.
The chosen length is highlighted in green.
Generating Text
Assuming that a blog topic has been entered, and a tone of voice selected, the ‘Generate’ button will become available. Clicking this will begin the generation process. This can take a while, so please wait for the process to complete.
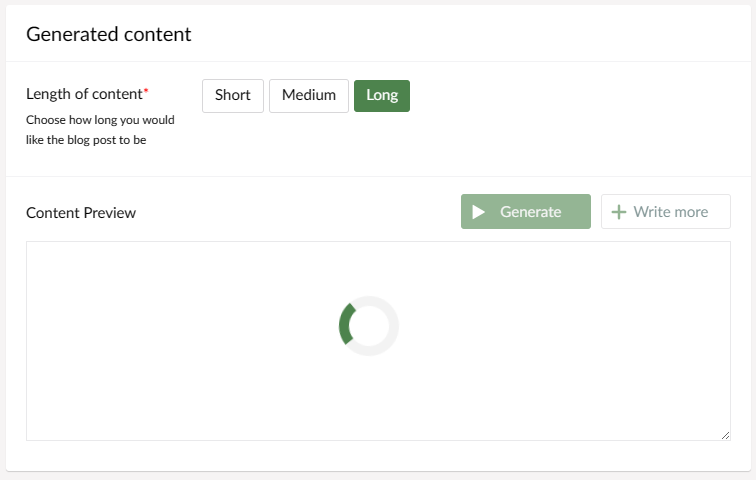
Content Preview
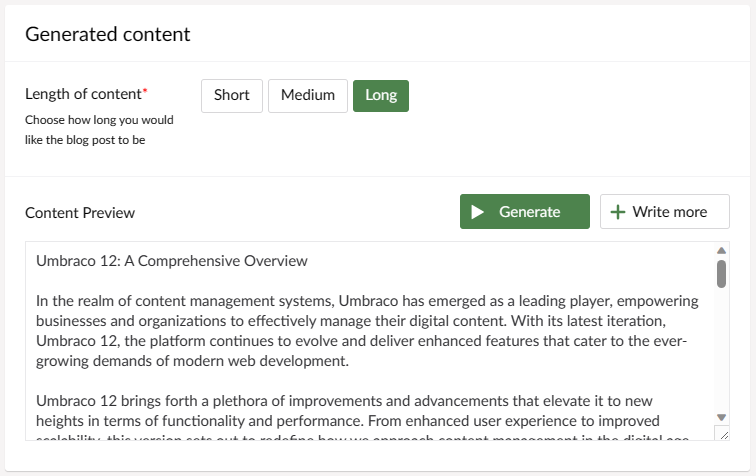
When complete, the Content Preview box will show the generated text.
Adding Website References
Although it reads reasonably well, it is fairly generic and lacking in detail, and is probably full of ‘guesswork’ on the part of ChatGPT because it most likely has no knowledge of Umbraco 12, due to being released well after the 2021 cutoff date for ChatGPT’s knowledge base. So, let’s improve it by going back to the ‘Website references’ and adding some useful sites for the AI system to work with.
Now when we click ‘Generate’ we will find some more detailed information in the generated text.
As you can see in the limited amount of text visible in the screenshot above, there are references to actual new features, such as headless functionality. Scrolling down a bit we can see references to ImageSharp and EF Core support, so this text is clearly much more detailed than the original text.
Write More
The ‘Write more’ button is enabled once you have generated some text. It attempts to extend the generated text by furthering the conversation with ChatGPT, and whilst this does work, it will sometimes give the impression of being two pieces of text bolted together, or there may be repetition. Use of this button is likely to result in some cleanup work of the generated text being required in the editor
Saving and Publishing the generated text
Once you are happy with the preview text, it is time to submit it back to the editor in the content view. To do this, click the ‘Submit’ button at the bottom right.
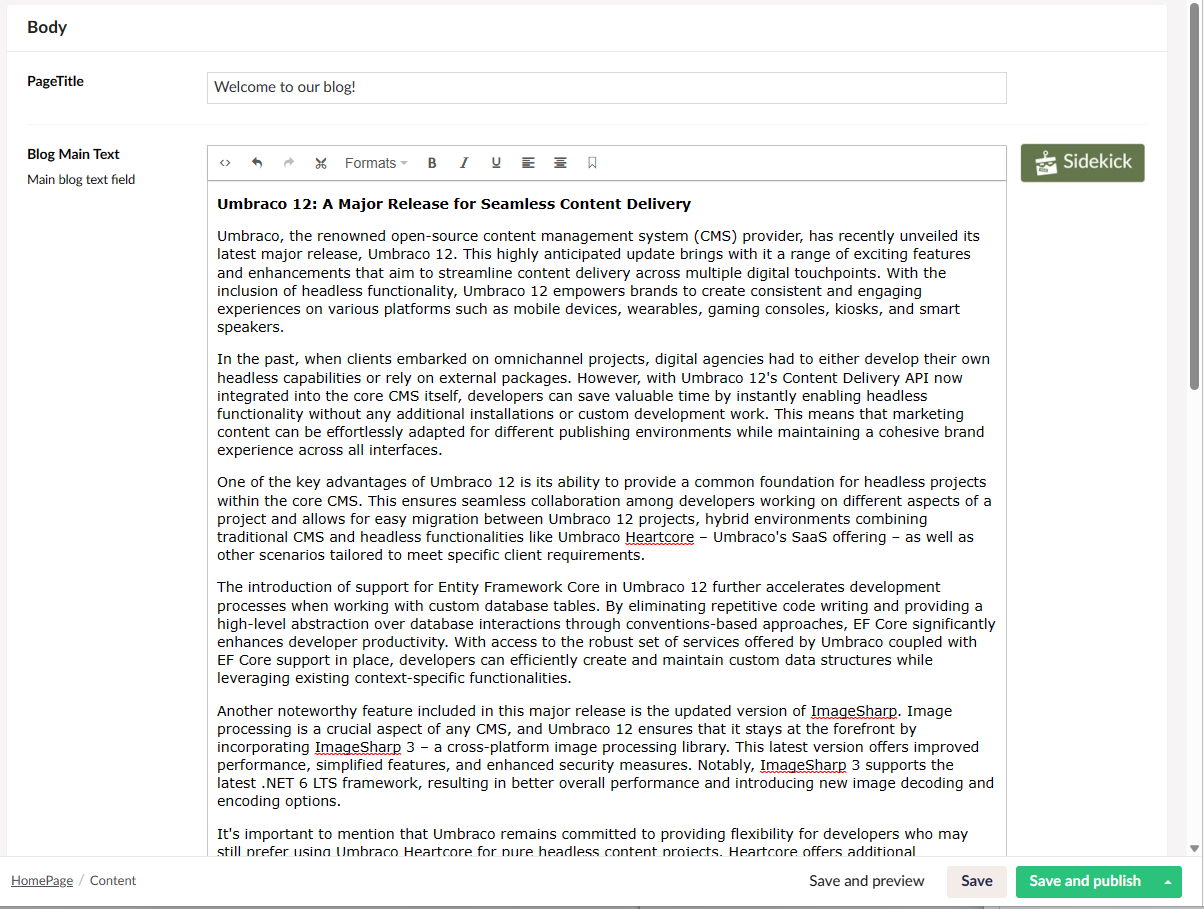
This will transfer the generated text into the editor ready for you to amend it, style it and publish it as if you had written it yourself.
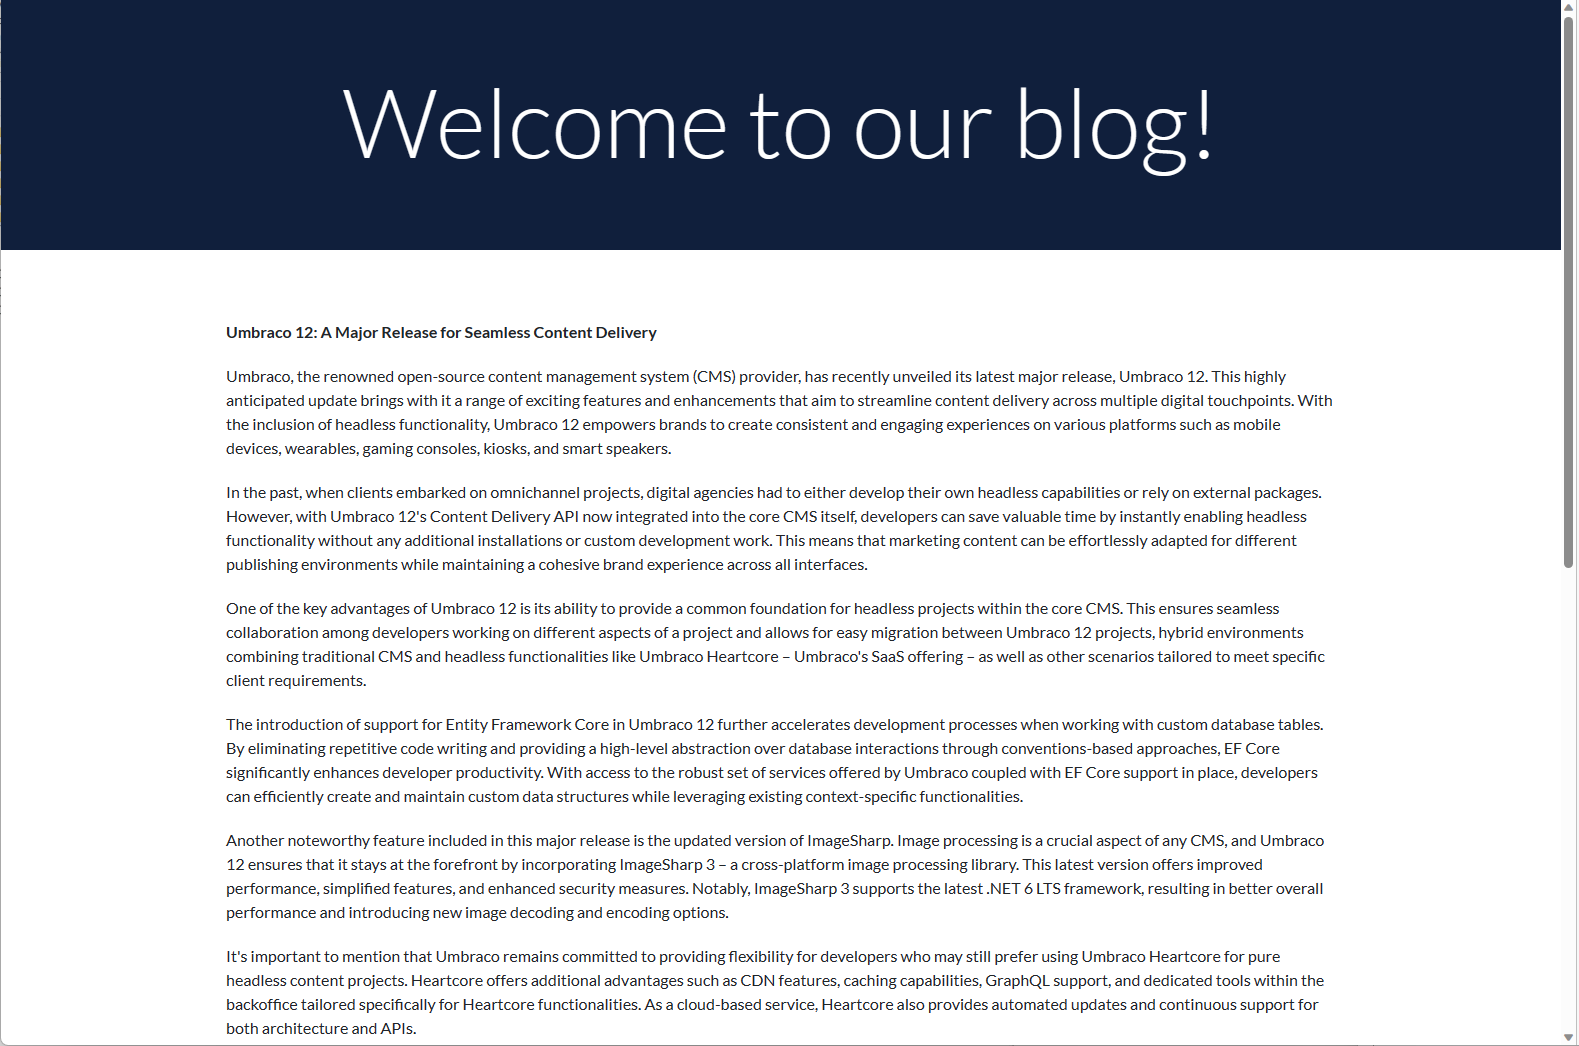
The Published Blog
Once you are happy with the text, click 'Save and publish' and your AI-assisted text will be live!
Disclaimer
Appcentric takes no responsibility for the accuracy or content of the generated text. OpenAI services are used to generate text and their accuracy is limited by the knowledge used to train the model, plus any data passed to it (such as tone-of-voice details and web reference sites). The ChatGPT api may produce inaccurate information about people, places, or facts. Appcentric is not responsible for any data kept by OpenAI. Please refer to the safety and privacy policies at OpenAI: Privacy policy (openai.com) and Terms & policies (openai.com).


